Contents
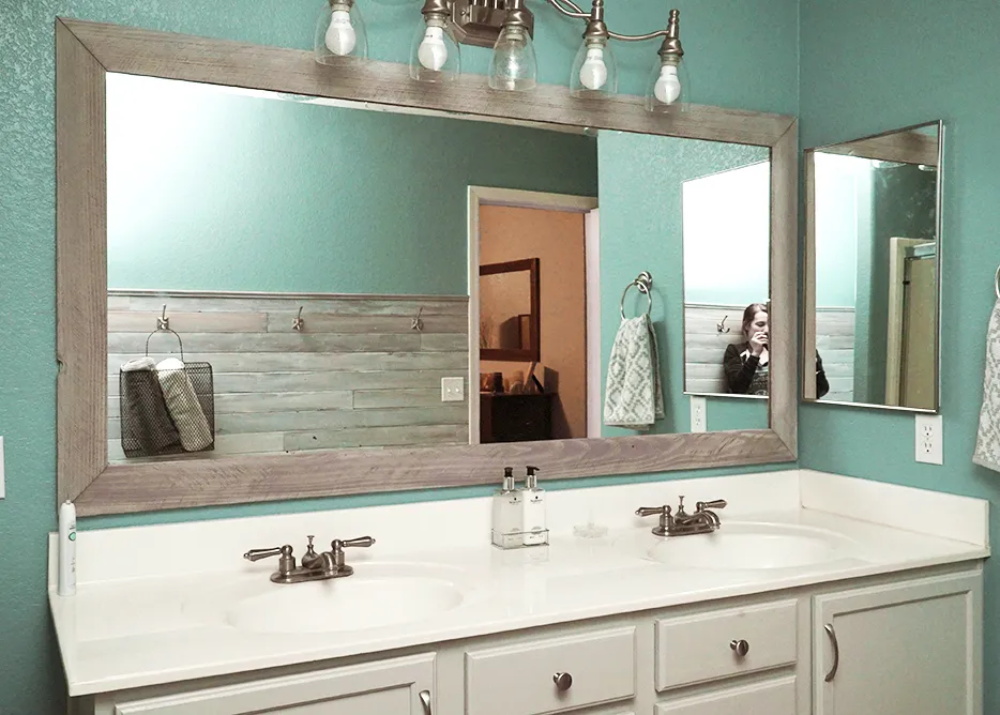
If you have a plain mirror on your wall, you can easily upgrade it with a custom-made frame. This project is simple, inexpensive, and versatile. You can choose any style of trim boards to match your decor, and you don’t need any nails or screws to attach them. All you need is some glue that works on glass, some basic tools, and some finishing supplies. Here’s how to make your own DIY mirror frame in a few easy steps.
What You’ll Need
- Miter saw or miter box
- Caulking gun
- Tape measure
- Pencil
- Finishing supplies
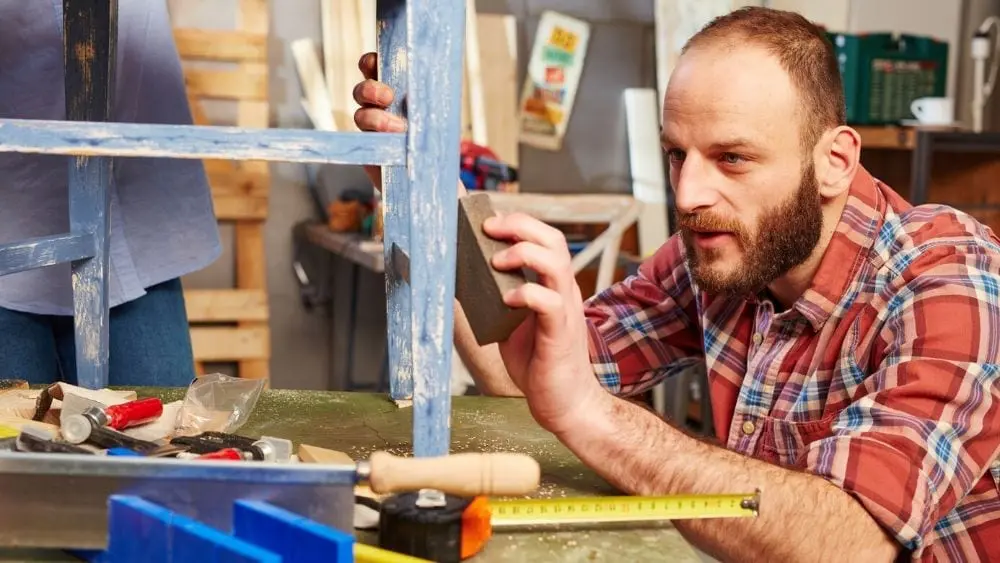
- Sanding block
- Trim boards (adjust dimensions and style accordingly)
- Adhesive rated for glass
- Paintable caulk (if painting)
- Rag
- Painter’s tape
Instructions
Measure Mirror
Use a tape measure to measure the length and width of your mirror. Write down these numbers and use them to calculate how much trim you need to buy. The inside dimensions of the frame should be slightly smaller than the mirror, so that there is some overlap for the glue to stick.
Buy Trim Boards
Pick your trim boards according to the look you want. You can use boards that are two to four inches wide for best results. You can also choose different types of wood or MDF for different effects. For example, if you want a rustic look, you can use knotty pine. If you want a coastal look, you can use natural wood with few knots. If you want a traditional look, you can use primed MDF trim with decorative details. Trim boards are sold in various lengths, so try to minimize waste by planning your cuts ahead.
Cut Miters in Boards
Use a miter saw or a miter box to cut 45-degree angles on each end of the boards, facing opposite directions. The long side of the top and bottom boards should match the length of the mirror, and the long side of the side boards should match the height of the mirror. After cutting, use a sanding block to smooth out any rough edges.
Glue Bottom Board
Apply a bead of adhesive along the back edge of the bottom board, leaving about an inch from each end. Press the board firmly against the bottom edge of the mirror, making sure it is aligned and level. Wipe off any excess glue with a rag.
Glue Side Boards
Apply adhesive to the back edges of the side boards in the same way as the bottom board. Press them against the side edges of the mirror, making sure they are aligned and flush with the bottom board. You can also apply some glue to the mitered corners for extra strength, but be careful not to squeeze out too much glue. Wipe off any excess glue with a rag.
Glue Top Board
Apply adhesive to the back edge of the top board in the same way as the other boards. Press it against the top edge of the mirror, making sure it is aligned and flush with the side boards. Wipe off any excess glue with a rag.
Finish Frame
Let the glue dry completely according to the manufacturer’s instructions. Then, you can finish your frame as you like. You can paint it, stain it, distress it, or leave it natural. If you paint it, you may want to use some paintable caulk to fill in any gaps between the boards and the mirror for a smoother look. Use painter’s tape to protect the mirror from paint splatters.
Tips
- Before gluing, you can dry-fit your frame on a flat surface to make sure everything fits together well.
- You can use clamps or weights to hold the boards in place while the glue dries.
- You can add some hooks or knobs to your frame for hanging jewelry or accessories.
How to Hang Your DIY Mirror Frame
Once your frame is finished and dry, you can hang it on your wall. Depending on the size and weight of your mirror, you may need different methods of hanging it securely. Here are some options:
- Use mirror clips. These are metal brackets that attach to the wall and hold the mirror in place. You can find them at most hardware stores. You will need to measure and mark where to place them on the wall, making sure they are level and aligned with the edges of the mirror. Then, you can drill holes and screw them in. Make sure you use anchors if you are drilling into drywall. You can also paint the clips to match your frame or wall color.
- Use picture wire. This is a thin metal wire that attaches to the back of the mirror frame with screws or hooks. You will need to measure and mark where to place the screws or hooks on the back of the frame, making sure they are evenly spaced and centered. Then, you can drill holes and screw them in. Make sure you use washers to prevent the screws from pulling through the wood. Then, you can thread the wire through the screws or hooks, leaving some slack in the middle. You will also need to install a picture hook or nail on the wall where you want to hang your mirror. Make sure you use a stud finder to locate a stud or use an anchor if you are drilling into drywall. Then, you can hang your mirror by hooking the wire over the picture hook or nail.
- Use French cleats. These are metal brackets that interlock with each other. One part attaches to the wall and the other part attaches to the back of the mirror frame. You will need to measure and mark where to place them on the wall and on the back of the frame, making sure they are level and aligned with each other. Then, you can drill holes and screw them in. Make sure you use anchors if you are drilling into drywall. Then, you can hang your mirror by sliding the brackets together.
Enjoy Your DIY Mirror Frame
You have successfully made and hung your own DIY mirror frame! Now you can enjoy its beauty and functionality in your home. You can also make more frames for other mirrors in your house, using different styles and colors of trim boards. Have fun with this project and let your creativity shine!